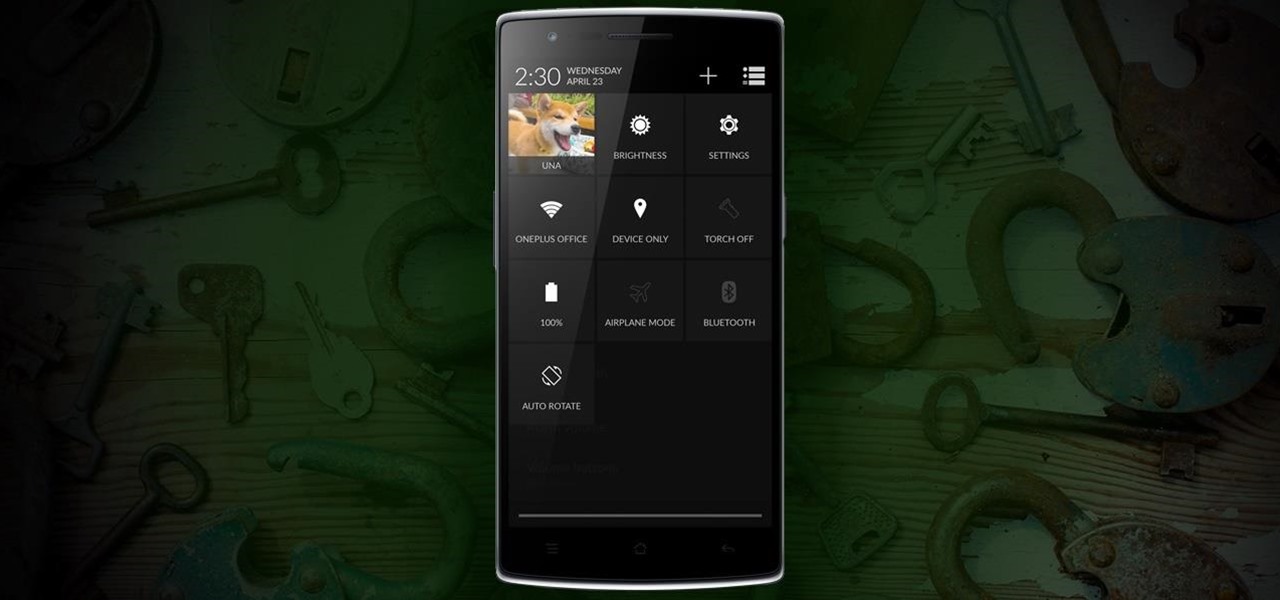

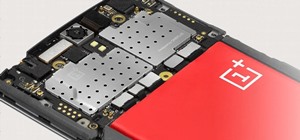
Due to its constant delays and lack of public invites, the OnePlus One is the equivalent of a unicorn in the Android community. I was lucky enough to win an invite in the OnePlus Storm of Invites promotion and have loved every minute with my new Nexus Killer since receiving it.
While not everybody has had the chance to get their hands on this phone yet, the lucky few of you that did are probably eager to start installing mods, most of which require root permission. The OnePlus One has many noteworthy features, but the most relevant to power users is how easy it is to root. So, if you have the fabled OnePlus flagship and are itching to get some Xposed goodness running on it, follow along.
Before We Get Started
There are a couple things you are going to need to get set up on your OnePlus One before being able to root it, besides having ADB installed on your computer.
Enable Developer options by tapping Build Number repeatedly seven times (which is located in Settings -> About Phone), then disable Update CM recovery and enable Android debugging.
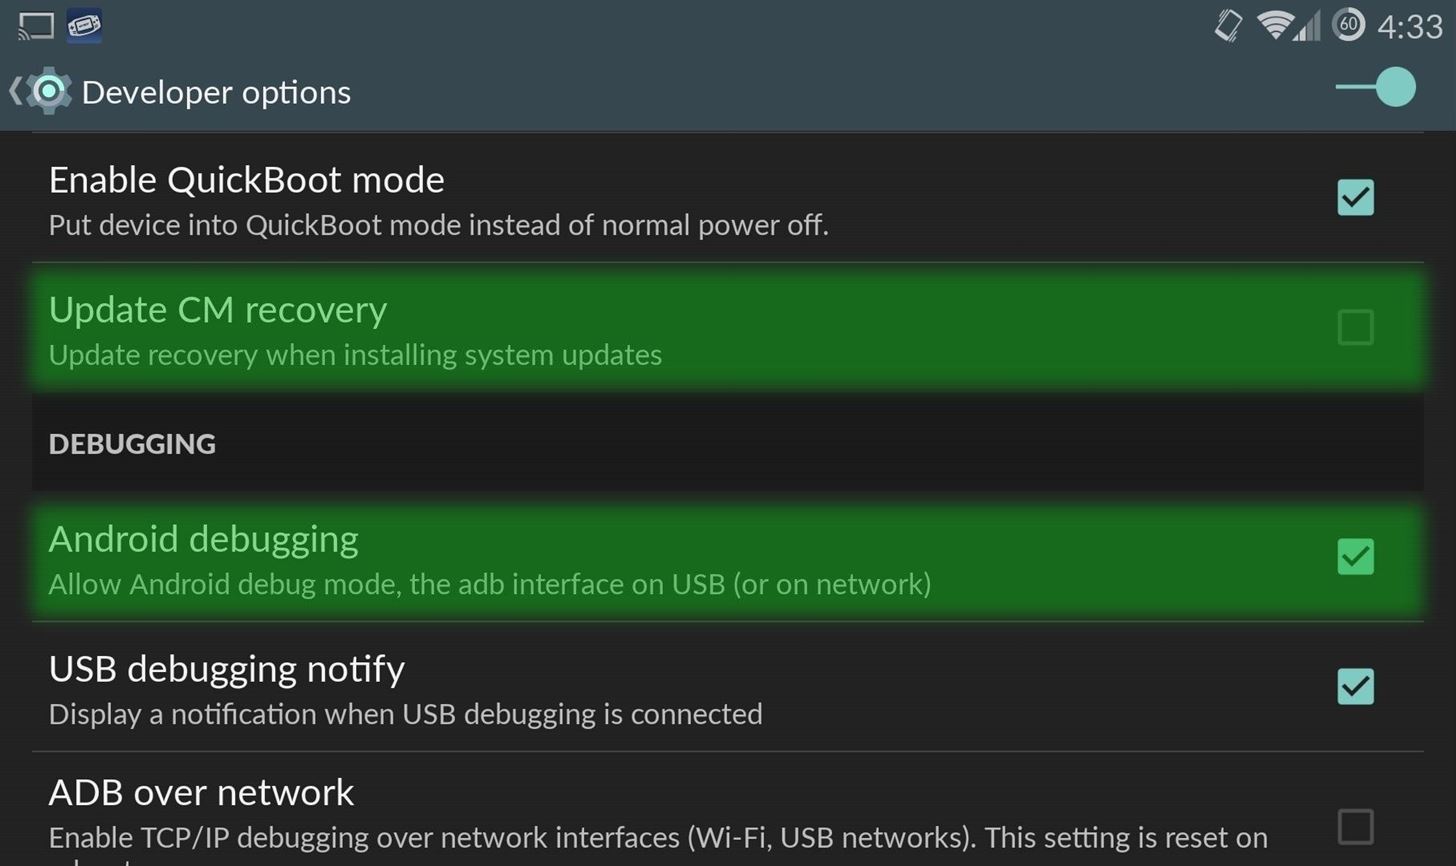
You need to disable update CM recovery because it impedes the installation of TWRP (the recovery I'll be flashing in this guide), and that is what we will be using to give the OnePlus One root permission.
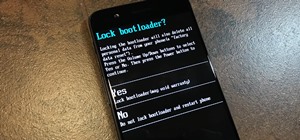
Step 1: Unlock Your Bootloader
Just like any other Android, unlocking your bootloader will cause you to lose all of the data from your phone, so be sure to back up any necessary information! Now plug in your device and open up a cmd/terminal window.
Enter your device into fastboot mode to input the unlock command:
- adb reboot bootloader
- fastboot oem unlock
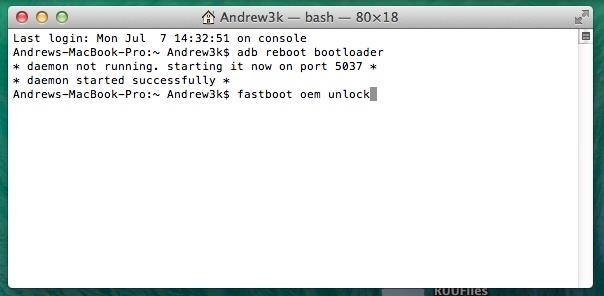
After entering that last command, the unlock process will begin automatically, so let it do its thing and wait for it to reboot. Once rebooted, you will need to go through the same setup process you did when you first got the OnePlus One, and after that, enable Android Debugging once again.
Step 2: Flash a Custom Recovery
Flashing a custom recovery will allow you to write directly to your device's system partion, and that is what we will need to grant root access. You have a few options when it comes to flashing a custom recovery, but I recommend using TWRP as it is the most stable—download the OnePlus One version to start:
With the file downloaded to you computer, you can now flash it to your device, but you will first need to enter fastboot mode again.
- fastboot reboot bootloader
- fastboot flash recovery Desktop/TWRP.img
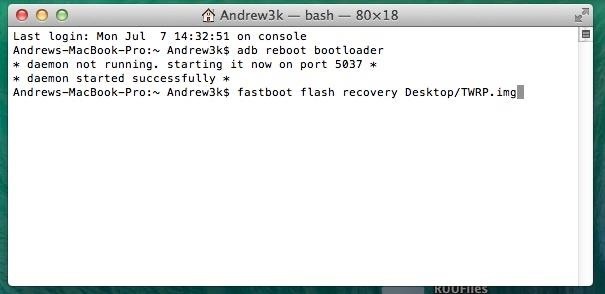
You will need to change the "Desktop/TWRP.img" to the location you downloaded TWPR to. Once that finishes flashing, reboot you system.
- fastboot reboot
Step 3: Copy SuperSU to Your Device
In this guide, I will be using Chainfire's SuperSU as my root app, so download the .zip file below and place it on your device.
You can also use adb to push the file over:
- adb push Desktop/SuperSu.zip /sdcard/

Again, change "Desktop/SuperSu.zip" to the location of your SuperSu.zip. Now that the .zip on your device, you will need to flash it from TWRP, so boot into recovery mode.
- adb reboot recovery
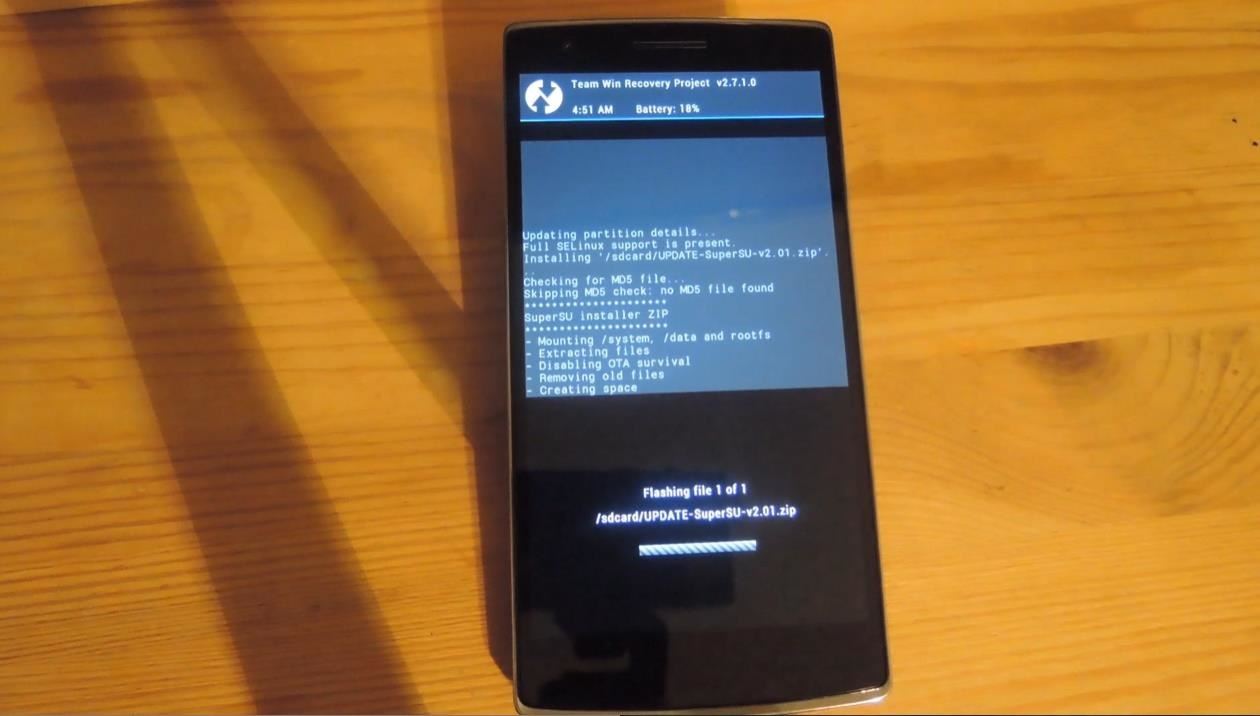
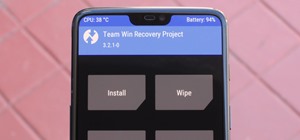
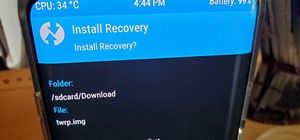
Step 4: Flash SuperSu in TWRP
Don't worry if TWRP takes a while to boot, that is normal. After it's up and running, tap Install, then Swipe To Confirm after selecting the .zip you pushed over earlier. Reboot after the flash completes.
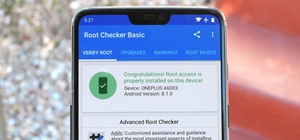
You are now the proud owner of a fully rooted OnePlus One with an unlocked bootloader, so go out and explore what others can only dream to get their hands on! Xposed and most other tweaks that are compatible with Nexus 5 are also compatible with the OnePlus One, but stay tuned for more updates on the OPO.
Just updated your iPhone? You'll find new emoji, enhanced security, podcast transcripts, Apple Cash virtual numbers, and other useful features. There are even new additions hidden within Safari. Find out what's new and changed on your iPhone with the iOS 17.4 update.


3 Comments
Isn t it sold pre rooted with supersu preinstalled?
Nope you have to do all of that yourself.
So I followed every step in this tutorial and got to the 3rd step right before the 4th step. I entered adb reboot recovery into the cmd and my oneplus one is stuck on the oneplus logo and cant go into recovery mode. What can I do??
Share Your Thoughts